Embarking upon a brick slip project requires a certain bit of planning:
Obvious important steps would be to measure up your wall space and choose the right brick slips. It is also worth setting time aside to choose the correct mortar and adhesive. These are all the fun parts, the bits which get your creative juices flowing and get you all excited for the job ahead.
We find through our customers orders that there are repeated items which often get forgot. Resulting in additional orders being made at our customers cost.
Top 4 Culprits
Here are the most commonly missed tools on our customers online orders.
Tape Measure
Measuring up accurately is perhaps the most important task when tackling a brick slip project – after all, once your brick slips have been adhered to your substrate there’s no going back.
Brick Slip spacers
Please don’t cut corners! There’s nothing worse than laying brick slips by eye, only to find that your spacing is all off. Such DIY disasters are avoidable though with the help of just a few small bits of plastic.
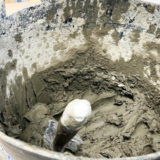
Bucket
If you think you’re going to complete your brick slip project without getting messy then think again. Mixing
both adhesive and mortar involves water and dry chemicals. To minimise the amount of mess you make, its always good to have a couple of cheap buckets to hand.
Notched Trowel
A notched trowel is the only way to effectively spread your adhesive onto the substrate. The notches allow an even spread of adhesive and make the job of apply the brick slips much easier.


